If you expose for where the light breaks through the trees you'll get underexposed areas
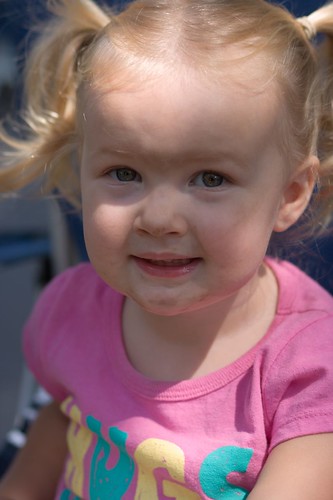
If you expose for the areas that are shadowed you'll get blowouts.

So what do you do?
1) lift the shadows with fill flash
2) bounce light from a reflector
3) photoshop it!
Normally for one of my sessions I'll avoid this type of lighting or use option #2. Its best to get things right in camera after all...However when I'm out camping and taking snaps the last thing I want to do is carry around cumbersome equipment. I despise on camera flash to option #1 is out of the question, and I'm not about to bust out with my speedlite while we are sitting around the camp fire. So lets get photoshopping!
Open your picture (duh). Here I used the one with some underexposure. When you get blowouts like the image above you lose data in those areas...they become big white blobs and when you send you image to your lab or home printer nothing will print there. On your channels palette while holding [ctrl] click on RGB. All of the bright areas of the picture will be selected.
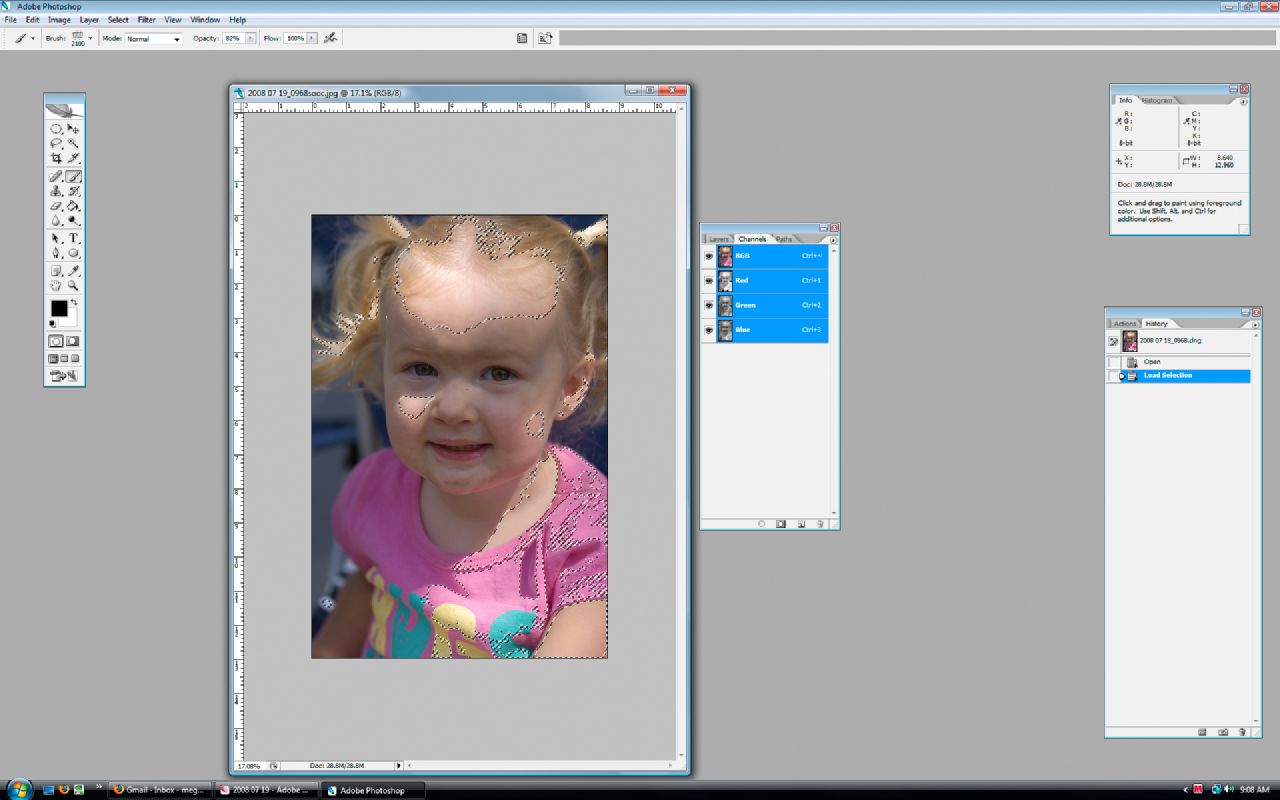
Hit ctrl+shift+i to inverse this selection (also found under select>inverse). Now all the dark areas are selected. Make a new layer using this selection (ctrl+j) and set it to screen.
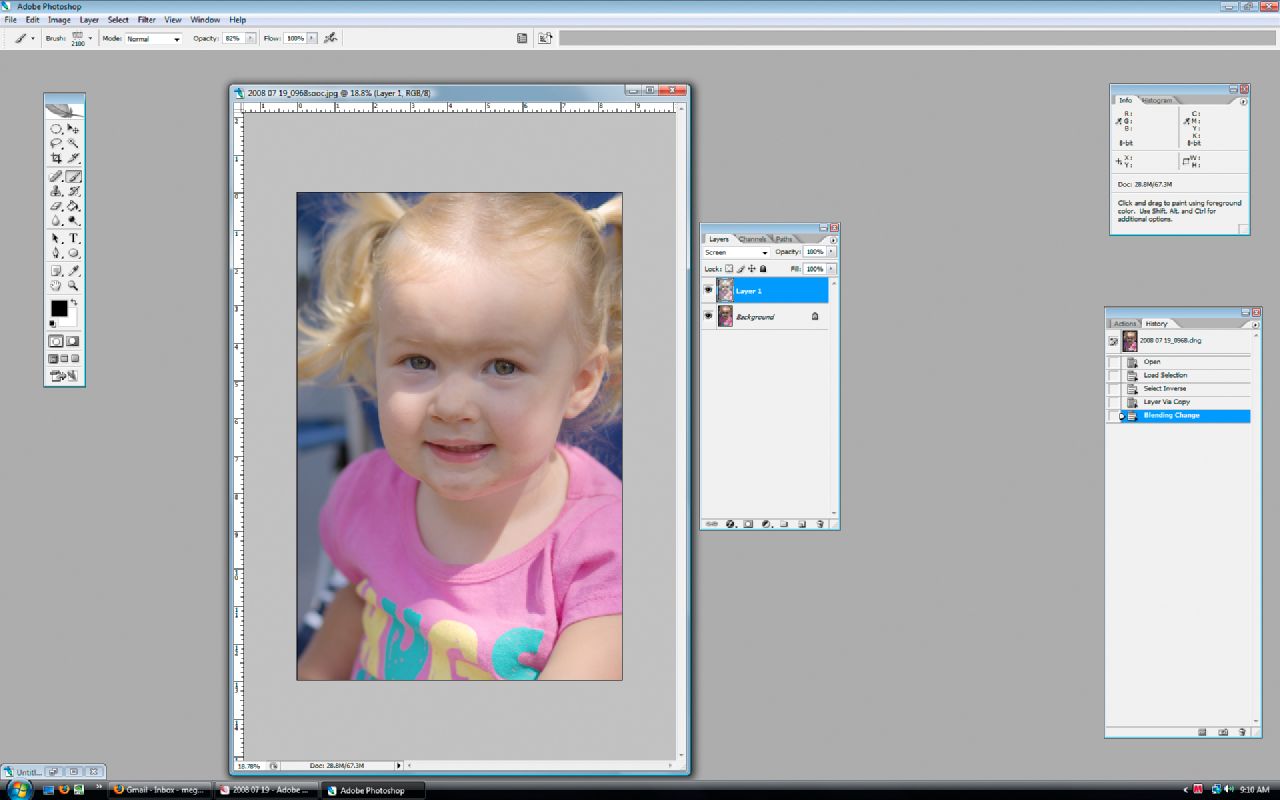
Adjust the opacity of this layer as necessary and then carry on with your normal photo processing (if you do any).
Here is my final image:

6 comments:
OMG, why didn't I ever know about this? Thanks so much for teaching me this!
I bow to your photoshop superiority :P
I was going to ask you to get Shannon to translate that into Paint shop language for me, but since she's bowing I guess maybe that won't happen :p
You just saved a weekend's worth of pictures! WOOT! Thank you!
You're the master!
Thanks so much for this!
Post a Comment